
A broken acrylic nail always happens at the worst possible moment. However, you do not need to panic or rush to the salon every single time. Knowing how to fix broken acrylic nails at home saves you time, money, and stress. In this guide, you will find everything you need to handle the repair confidently and correctly.
What Causes Acrylic Nails to Break?
Acrylic nails are strong but they are not unbreakable. Several everyday situations cause them to crack, snap, or lift. Understanding the cause helps you prevent it from happening again.
Accidental impact is the most common reason. Hitting your nail against a hard surface puts sudden pressure on the acrylic. As a result, even a small bump can cause a clean snap or deep crack.
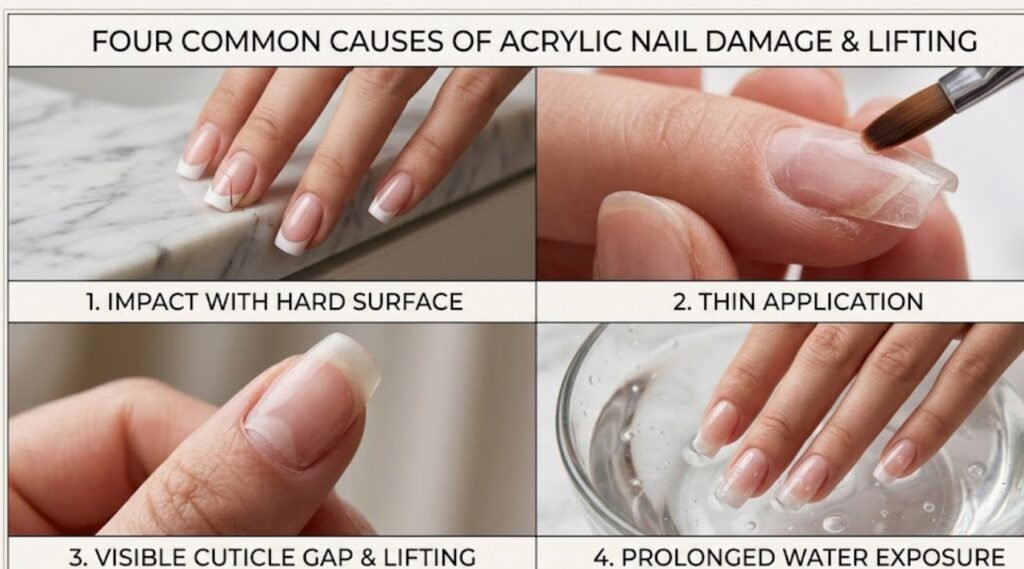
Improper application also plays a big role. When a technician applies the acrylic too thin or unevenly, weak spots form. Therefore, those spots break much faster under normal daily use.
Skipping fills weakens the nail significantly. As your natural nail grows, a gap forms between the acrylic and your cuticle. Consequently, the nail loses its structural support and snaps more easily.
Exposure to water and chemicals dries out the acrylic over time. Harsh cleaning products, acetone, and long soaks in water all break down the acrylic bond. Furthermore, this makes the nail brittle and prone to cracking.
Tools You Need to Fix Broken Acrylic Nails
Before you start any repair, gather the right tools first. Using the correct supplies makes the process faster and the result much cleaner.
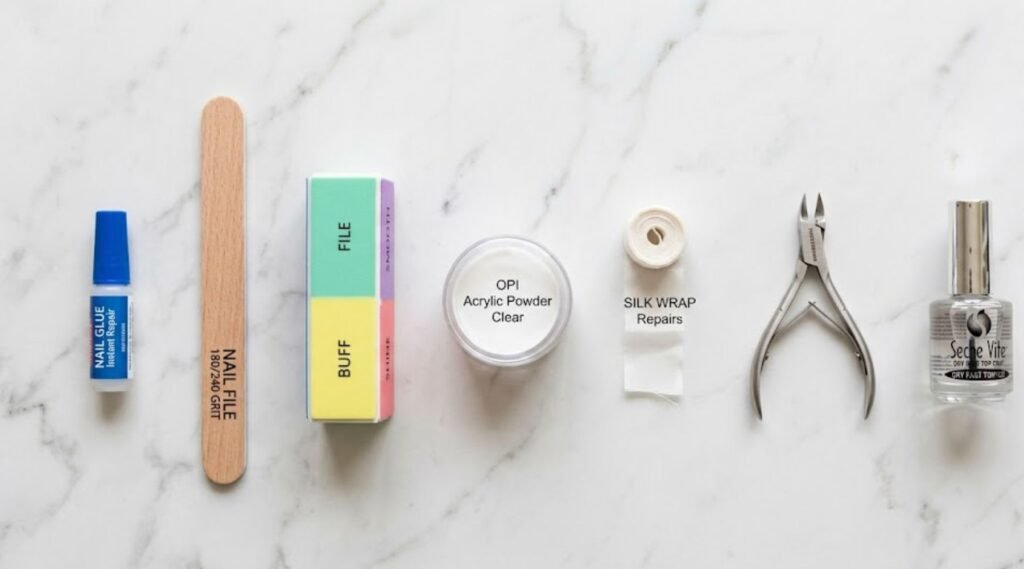
Here are the essential tools you need:
Nail Glue
This is your most important tool. It bonds the broken pieces back together instantly. In addition, it seals small cracks and prevents further splitting.
Nail File and Buffer
You need a file to shape the repaired nail. A buffer smooths out any rough edges after the repair. Therefore, always keep both in your nail kit.
Acrylic Powder and Liquid
For deeper breaks, acrylic powder fills and rebuilds the damaged area. This gives the nail extra strength and a smooth finish.
Silk Wrap or Nail Patch
A silk wrap reinforces the repair from the outside. It acts like a bandage over the break. Furthermore, it stops the crack from spreading further.
Nail Clippers
Sometimes a nail breaks too low to repair. In that case, clippers help you trim it cleanly and safely.
Topcoat or Clear Polish
Always seal your repair with a topcoat. This locks everything in place and adds a neat, finished look.
How to Fix Broken Acrylic Nails at Home
Now you have your tools ready. Next, follow these simple steps to fix your broken acrylic nail quickly and effectively.
Step 1 Assess the Damage
First, look at the break carefully. Is it a small crack, a partial break, or a complete snap? The type of break decides which repair method you use. Therefore, never skip this first step.
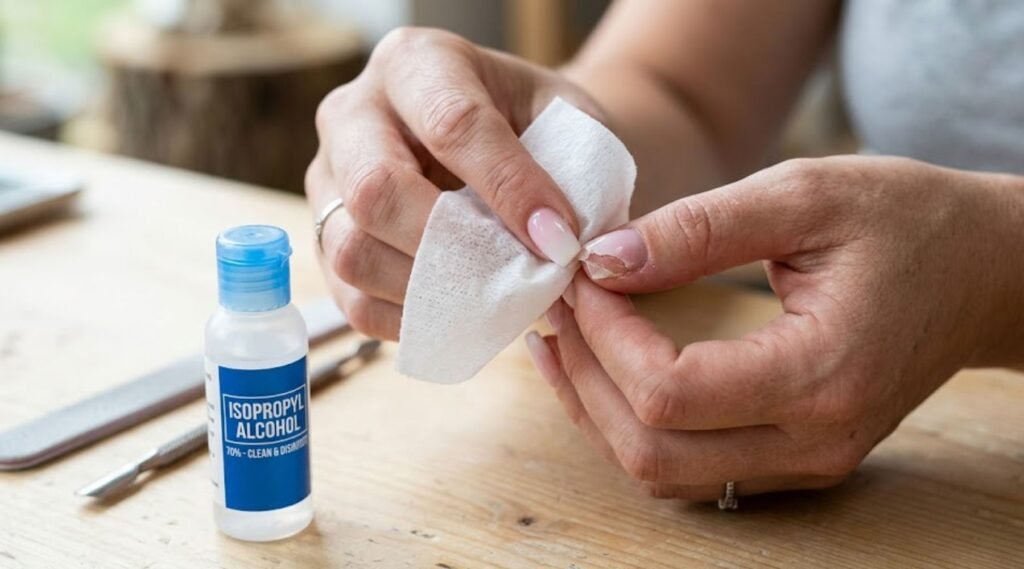
Step 2 Clean the Nail
Wipe the broken area with a lint-free nail wipe and rubbing alcohol. This removes oil, dust, and moisture from the surface. In addition, a clean surface helps the nail glue bond much more strongly.
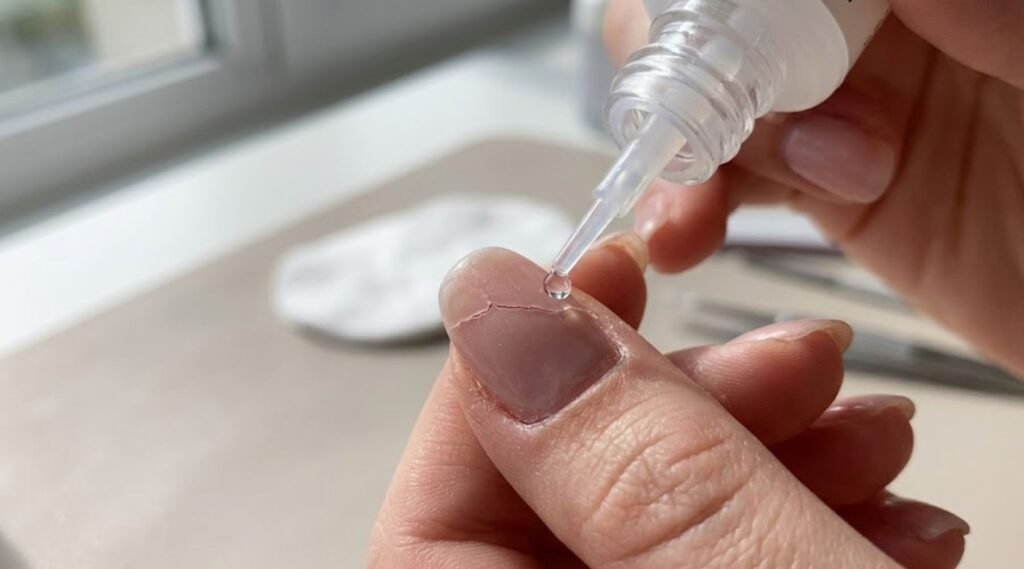
Step 3 Apply Nail Glue to the Break
For a crack or partial break, apply a small drop of nail glue directly into the crack. Press the broken edges together firmly and hold for 30 seconds. As a result, the glue seeps into the crack and bonds the pieces tightly.
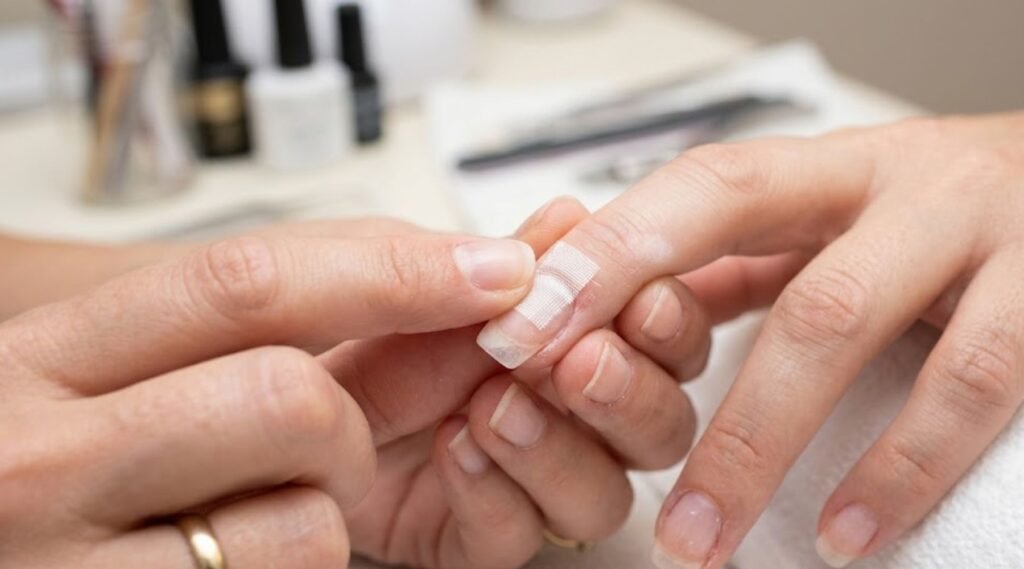
Step 4 Apply a Silk Wrap or Nail Patch
Cut a small piece of silk wrap to cover the cracked area. Press it firmly over the glue while it is still slightly tacky. Next, apply another thin layer of nail glue over the silk wrap to seal it completely.
Step 5 Build with Acrylic Powder (For Deep Breaks)
If the break is deep or structural, mix a small acrylic bead and press it gently over the repaired area. Smooth it out before it hardens. Furthermore, this adds a strong protective layer over the weak spot.
Step 6 File and Shape
Once everything dries completely, use your nail file to reshape the nail. File in one direction only to avoid stress on the repair. Then buff the surface smooth for a clean, even finish.
Step 7 Apply Topcoat
Finally, apply two thin layers of clear topcoat over the entire nail. This seals the repair, adds shine, and locks everything in place. Your nail is now ready and strong again.
Different Types of Acrylic Nail Breaks and How to Handle Each
Not every break looks the same. Therefore, each type needs a slightly different approach.
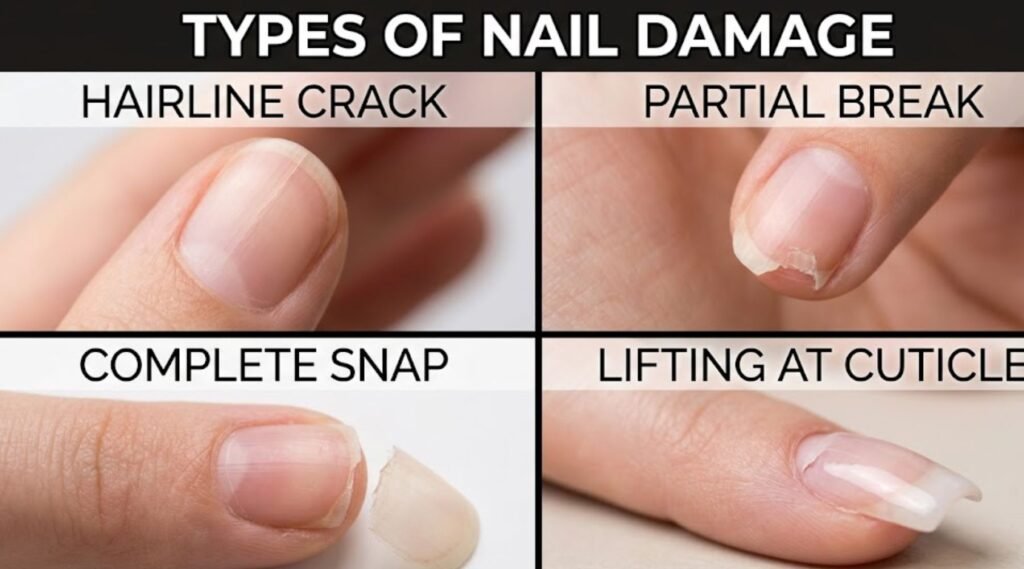
Hairline Crack
This is a thin surface crack with no separation. Apply nail glue directly into the crack and seal with a topcoat. In addition, a silk wrap adds extra protection over the crack.
Partial Break
The nail breaks halfway but still connects on one side. Do not pull the broken piece off. Instead, apply glue carefully, press together, and reinforce with a silk wrap and acrylic powder.
Complete Snap
The nail breaks off entirely. If the break sits above the fingertip, you can glue a nail tip onto the remaining acrylic. However, if it breaks at or below the nail bed, visit a salon immediately.
Lifting at the Cuticle
The acrylic separates from the natural nail near the base. Clean the lifted area with alcohol, apply fresh nail glue, and press down firmly. Furthermore, get a fill appointment as soon as possible to prevent further lifting.
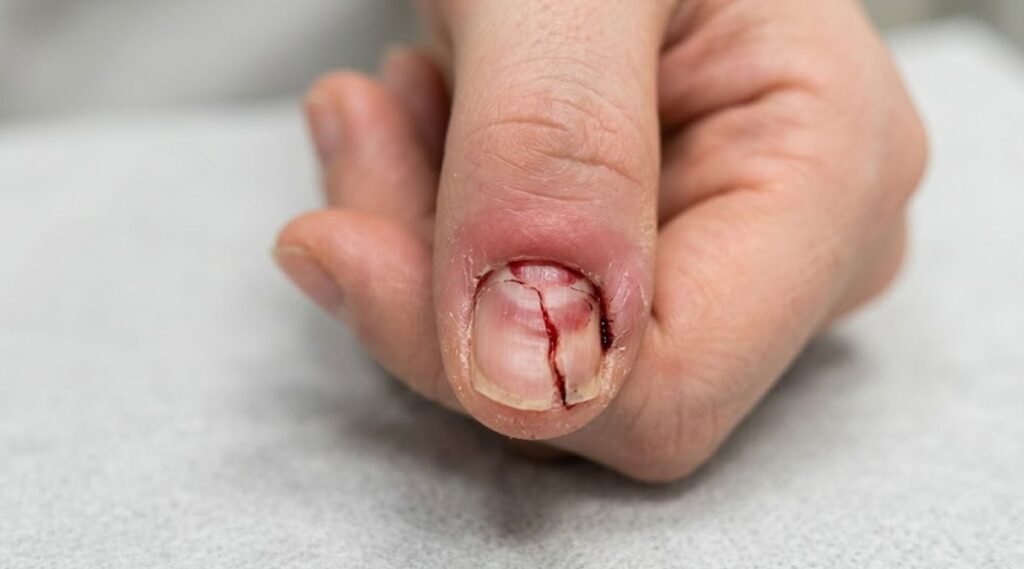
When to Visit a Salon Instead of Fixing It Yourself
Home repairs work well for minor breaks. However, some situations require professional help right away.
Visit a salon if the break reaches the nail bed. A break that deep causes pain, bleeding, or exposed skin. Trying to repair it at home risks infection and further damage. Therefore, always let a professional handle low breaks.
Go to a salon if you notice signs of infection. Redness, swelling, pus, or unusual odor around the nail means bacteria entered the break. In addition, green or yellow discoloration under the nail signals a fungal problem. Both need professional and sometimes medical attention.
See a technician if the acrylic lifts severely. Widespread lifting means the entire set needs removal and reapplication. Patching severely lifted nails at home never gives a safe or lasting result. Consequently, a fresh set is always the better choice in this case.
How to Prevent Acrylic Nails from Breaking Again
Fixing a broken nail is easy. However, preventing the break in the first place is even better. Follow these simple tips to keep your acrylics strong and intact.
Get regular fills every two to three weeks. Fills maintain the structural integrity of your acrylics. Furthermore, they stop the gap from growing and weakening the nail.
Wear gloves during household chores. Cleaning chemicals and long water exposure break down acrylic bonds quickly. Therefore, always protect your nails with rubber gloves when cleaning or washing dishes.
Avoid using your nails as tools. Never use your acrylic nails to open cans, scrape stickers, or pry things open. This puts sudden pressure on the nail and causes instant breaks. In addition, it damages the natural nail underneath.
Moisturize your cuticles daily. Dry cuticles lead to lifting, which leads to breaks. Apply cuticle oil every day to keep the nail and surrounding skin hydrated. As a result, your acrylics stay bonded and flexible longer.
Choose the right nail length. Very long acrylic nails break far more easily than short or medium lengths. Therefore, pick a length that suits your lifestyle and daily activities. Shorter nails handle daily wear much better.

Conclusion
A broken acrylic nail feels frustrating but now you know exactly how to fix broken acrylic nails at home with confidence. Assess the damage first, use the right tools, and follow each repair step carefully. In addition, take prevention seriously so breaks happen less often. However, always visit a salon when the damage goes beyond a simple crack. Your nails deserve proper care so start using these tips today and keep your acrylics looking flawless every single day.
FAQs
Q1: How to fix broken acrylic nails without going to a salon?
A: Use nail glue and a silk wrap to bond and seal the break cleanly at home.
Q2: Can I use super glue instead of nail glue to fix a broken acrylic nail?
A: No, super glue damages the nail bed and skin always use proper nail glue only.
Q3: How long does a home acrylic nail repair last?
A: A proper home repair lasts up to one to two weeks with a topcoat applied over it.
Q4: Should I remove the acrylic nail completely if it breaks badly?
A: Yes, remove it completely if the break reaches the nail bed or causes pain and bleeding.
Q5: How to fix broken acrylic nails that keep lifting at the cuticle?
A: Clean the area, apply fresh nail glue, press firmly, and book a fill appointment soon.