
Your acrylic nails look fabulous, but now they’re lifting at the edges, growing out awkwardly, or you’re simply ready for a change. So, how do I take off acrylic nails without ruining the natural nail underneath? That’s the exact question millions of people search every month, and for good reason. Ripping or peeling acrylics off the wrong way can leave your nails thin, weak, and painful for weeks.
This guide walks you through everything you need to know. You’ll learn the safest removal methods, the tools you actually need, and the mistakes that cause the most damage. By the end, you’ll feel confident handling acrylic removal at home or knowing exactly when to book a salon appointment instead.
What Are Acrylic Nails?

Acrylic nails are a popular nail enhancement made from a mix of liquid monomer and powder polymer. When combined, these two ingredients form a thick paste that hardens into a durable, sculpted shell over your natural nail.
Nail technicians apply this paste over a nail tip or directly onto your natural nail bed. Afterward, they shape and buff the surface until it looks smooth and glossy. The result is a strong, chip-resistant nail that can last for weeks.
Many people love acrylics because they’re affordable, long-lasting, and easy to customize, whether you prefer soft pink ombre sets or bold black acrylic nails. However, because the product bonds so tightly to your natural nail, removing it requires real care. Otherwise, you risk peeling away healthy nail layers right along with the acrylic.
Why People Remove Acrylic Nails
Plenty of reasons might push someone toward removing their acrylics. Maybe your nails have grown out significantly, leaving an obvious gap near the cuticle, which naturally raises questions about how long acrylic nails last before reaching this point. Or perhaps you’ve noticed lifting, cracking, or trapped moisture underneath, which can lead to infection without prompt attention.
Some people simply want to give their natural nails a break. Wearing acrylics continuously, without any rest period, can weaken the nail plate over time. Meanwhile, others switch because they’re curious about acrylic vs. gel nails and want to compare the two side by side.
Whatever the reason, the real question becomes this: how do I take off acrylic nails without causing extra damage? Rushing the process or grabbing the wrong tools often causes more harm than the acrylics themselves ever did.
How Do I Take Off Acrylic Nails Safely at Home?
The most trusted method for safe at-home removal involves soaking your nails in pure acetone. This dissolves the acrylic material gradually, so it softens and lifts away from your natural nail without any force.
Although acetone has a strong smell and can dry out your skin, it remains the safest chemical option for breaking down acrylic. Skip nail polish removers labeled “acetone-free,” since these won’t dissolve acrylic effectively and may tempt you to pick or pry instead.
Before you begin, set aside about 45 minutes to an hour. Patience truly is the key ingredient here, since rushing leads to scraping, peeling, and unnecessary nail damage.
Step-by-Step Process to Take Off Acrylic Nails
Ready to finally tackle the question, how do I take off acrylic nails step by step? Follow this breakdown for a smooth, damage-free experience.
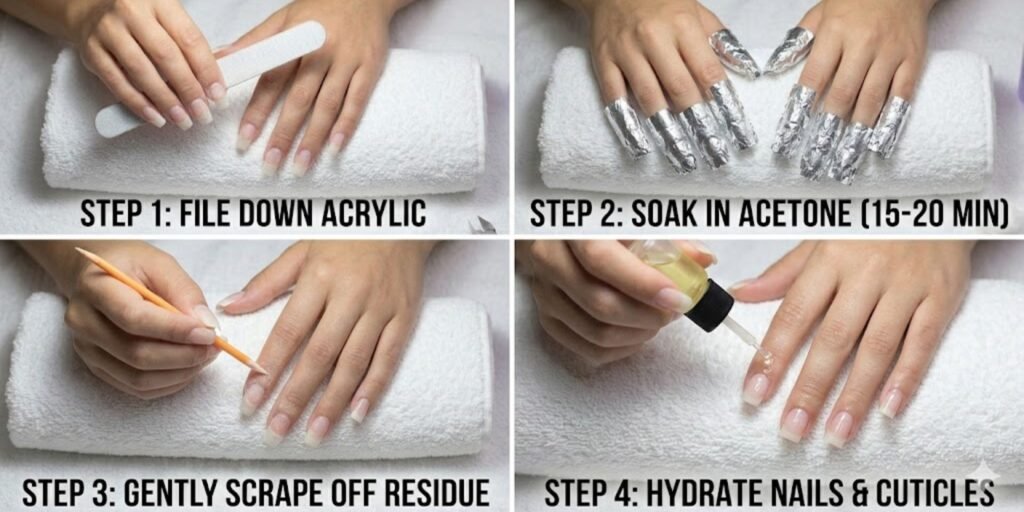
Step 1: Trim and File the Acrylic
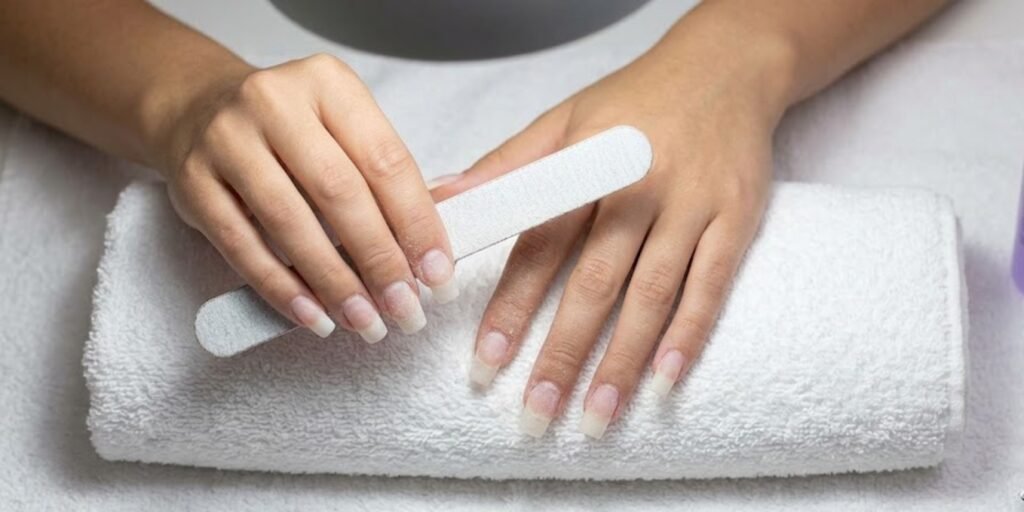
Start by trimming your acrylic nails down as short as comfortably possible using a nail clipper. Next, grab a coarse nail file or buffer and gently remove the top glossy layer of the acrylic.
This step helps the acetone penetrate faster. Consequently, you’ll spend less time soaking and reduce your overall exposure to the chemical.
Step 2: Protect Your Skin
Before soaking, apply a thick layer of petroleum jelly or cuticle oil around your skin and cuticles. This creates a barrier that keeps acetone from drying out the surrounding skin.
Step 3: Soak Your Nails
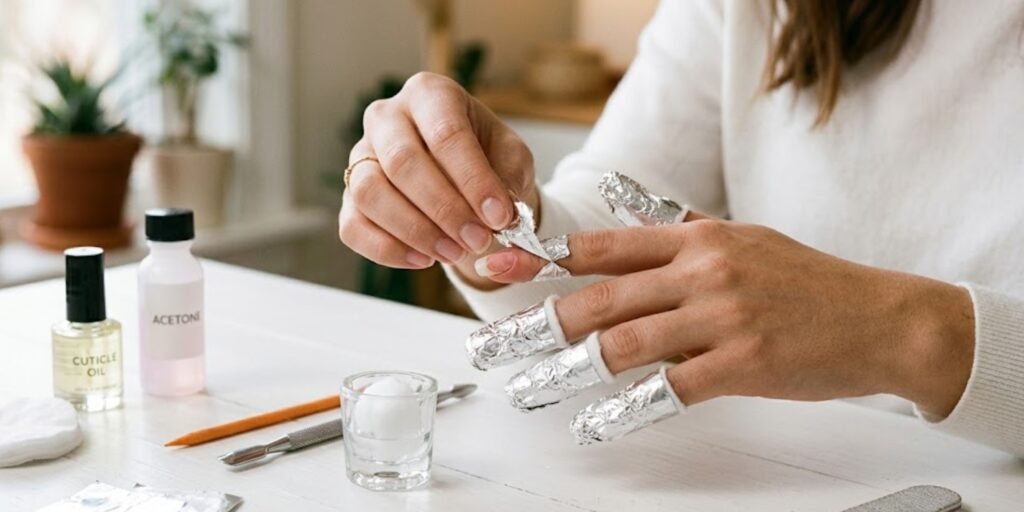
Pour pure acetone into a small glass bowl. Then, soak cotton balls in the acetone and place one directly on each nail.
Wrap each fingertip in a small piece of aluminum foil to hold the cotton in place and lock in heat, which speeds up the breakdown process. Leave your nails wrapped for 20 to 30 minutes.
Step 4: Check and Gently Remove
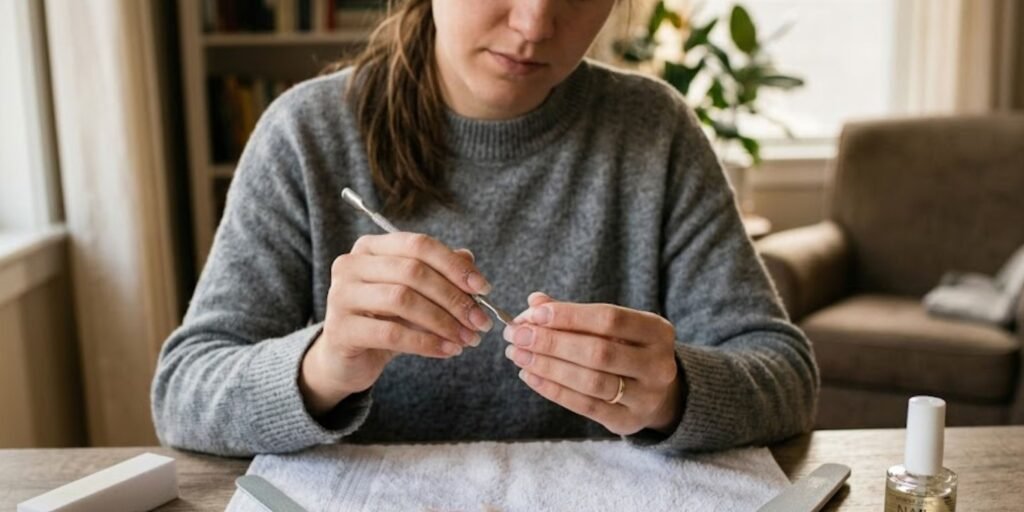
After soaking, unwrap one finger at a time to check the acrylic’s progress. It should look soft and bubbly, and you should be able to push it off easily using a cuticle pusher or orange wood stick.
If the acrylic doesn’t budge easily, rewrap that finger and soak it for another 10 minutes. Never force or scrape stubborn acrylic, since doing so often pulls off layers of your natural nail too.
Step 5: Buff and Moisturize
Once all the acrylic comes off, gently buff away any leftover residue using a soft buffer block. Finish by washing your hands thoroughly and applying a generous amount of cuticle oil or hand cream.
Tools and Materials Needed
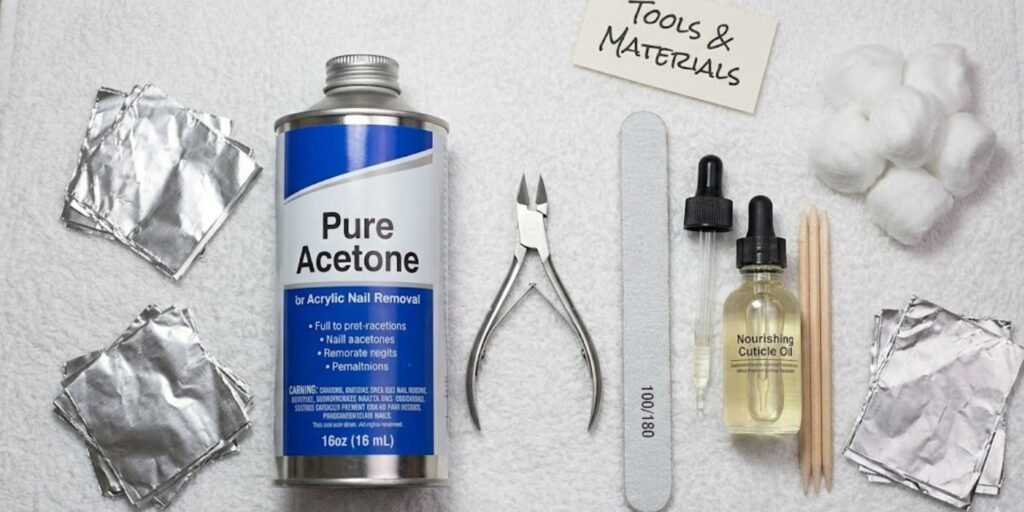
Gather these supplies before you start your removal process:
- Pure acetone (100%, not a blend)
- A small glass or ceramic bowl
- Cotton balls or pads
- Aluminum foil
- A coarse nail file or buffer
- Nail clippers
- A cuticle pusher or orange wood stick
- Petroleum jelly or cuticle oil
- A hand towel
- Moisturizing hand cream
Having everything ready beforehand makes the entire process faster and far less frustrating.
Common Mistakes to Avoid
Even with good intentions, plenty of people accidentally damage their nails during removal. Watch out for these common pitfalls:
- Peeling or prying acrylics off instead of soaking them, which strips away healthy nail layers.
- Skipping the filing step, which makes the acetone take much longer to work.
- Using acetone-free remover, since it won’t dissolve acrylic properly.
- Soaking for too short a time, then forcing the acrylic off anyway.
- Forgetting to moisturize afterward, which leaves nails dry, brittle, and prone to breaking.
If you recognize any of these habits, now’s a great time to break them. Your natural nails will genuinely thank you.
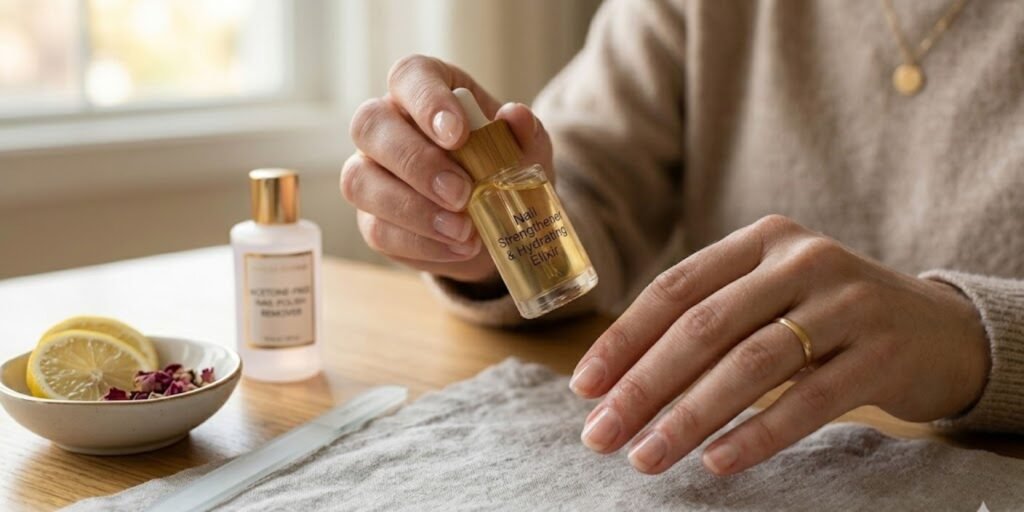
How to Protect Natural Nails After Removal
Once your acrylics come off, your natural nails need some extra love. They’ve spent weeks covered up, so they’re likely thinner, drier, and more fragile than usual.
First, keep your nails short for a week or two. Shorter nails are less likely to snag or break while they recover their strength, and if you enjoy the look, plenty of short acrylic nail ideas exist for whenever you’re ready to go again.
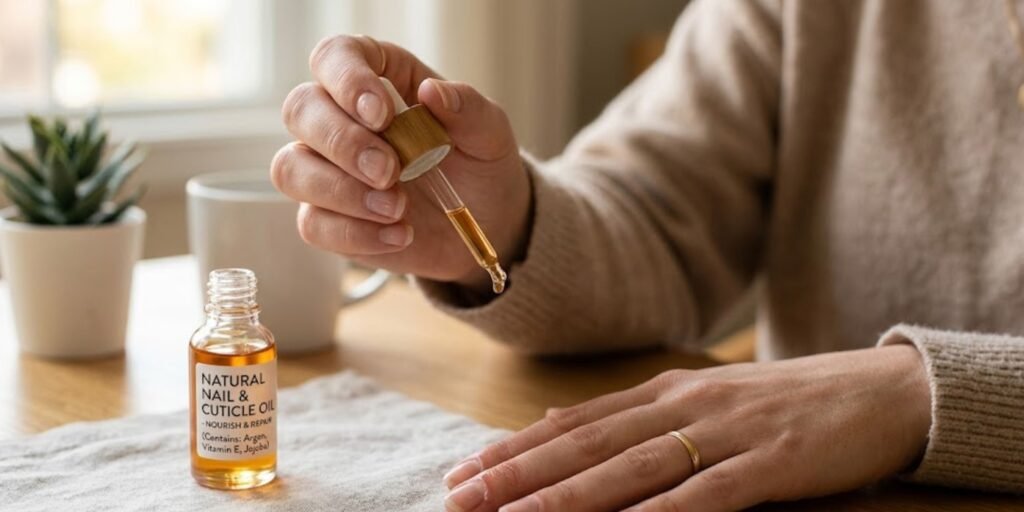
Next, apply cuticle oil daily, ideally both morning and night. This simple habit restores moisture and encourages healthier growth.
Additionally, consider using a strengthening nail treatment or base coat. Look for ingredients like biotin, keratin, or calcium, since these support nail health from the outside in.
Finally, give your nails a break before applying another set of acrylics. Most nail experts recommend waiting at least one to two weeks so your natural nails can breathe and recover fully.
Professional Removal vs DIY Removal
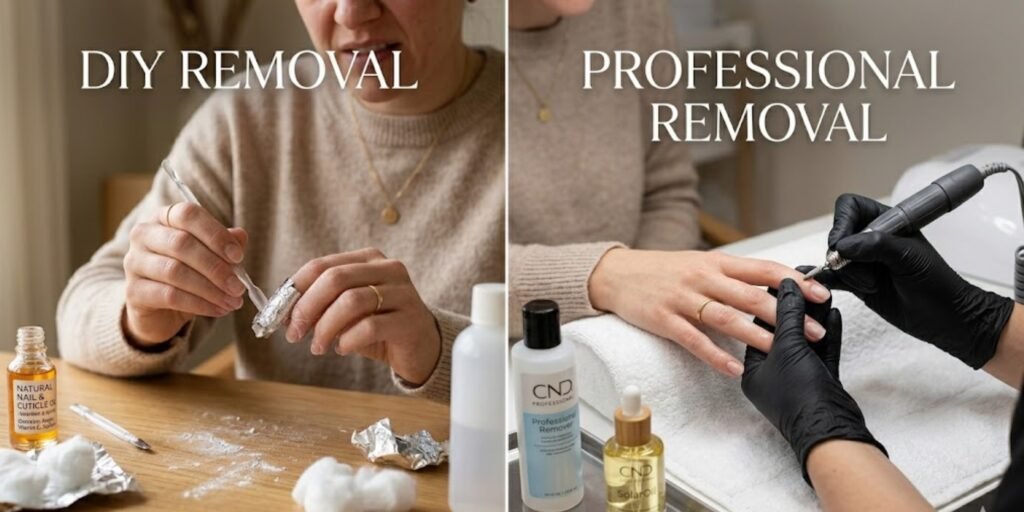
Deciding between a salon visit and removing your nails yourself depends on a few key factors.
When DIY Removal Makes Sense
DIY removal works well when your acrylics are lifting evenly, you already have the right tools on hand, and you’re comfortable being patient throughout the process. It’s also more affordable and convenient when you’re in a pinch.
When Professional Removal Is Better
On the other hand, professional removal is worth the cost when your nails feel painful, when you notice signs of infection, or when the acrylic is unusually thick. Nail technicians have specialized tools, like e-files, that speed up the process safely.
They also bring trained eyes that catch early signs of nail damage you might otherwise miss at home. If you’ve never removed acrylics before, a salon visit can teach you exactly what proper removal should feel like.
Expert Tips for Healthy Nails
Maintaining strong, healthy nails goes well beyond just removal day. Pairing these habits with other acrylic nail maintenance tips can keep your hands looking polished between every fill:
- Wear gloves while cleaning or washing dishes to limit water and chemical exposure.
- Avoid using your nails as tools to open cans or scrape labels off jars.
- Eat a balanced diet rich in protein, biotin, and healthy fats.
- Stay hydrated, since dehydration affects nail strength too.
- Schedule regular nail breaks between enhancement sets.
Small, consistent habits make a noticeable difference over time. Therefore, treating your nails gently every single day pays off in the long run.
Signs You Should Visit a Nail Salon
At-home removal works well for most people, yet certain signs mean it’s time to call a professional instead.
Watch closely for these warning signs:
- Sharp pain or tenderness around the nail bed
- Visible redness, swelling, or pus, which may indicate infection
- Acrylic that won’t lift even after extended soaking
- Natural nails that feel extremely thin or bend easily
- Lifting acrylic with visible mold or discoloration underneath
If you notice any of these symptoms, skip the DIY route entirely. A licensed nail technician or dermatologist can address the issue safely before it gets worse.
Conclusion
Knowing how to take off acrylic nails safely protects both your time and your natural nail health. Soaking in pure acetone, filing beforehand, and resisting the urge to peel all make a real difference in how your nails look and feel afterward.
Remember to gather your tools, work patiently, and stop the moment something feels wrong. Whether you choose the DIY route or head to a professional, patience remains your best tool throughout the entire process.
Give your nails the moisture and rest they need once the acrylic comes off, and they’ll bounce back stronger within a few weeks. Ready for your next set? Treat your natural nails kindly in between, keep them moisturized daily, and they’ll reward you with healthier growth every single time.
FAQs
How long does it take to remove acrylic nails at home?
Removing acrylic nails at home typically takes 45 minutes to an hour, depending on thickness.
Can I use regular nail polish remover instead of acetone?
No, regular nail polish remover won’t break down acrylic effectively, so pure acetone works best.
Will removing acrylic nails damage my natural nails?
Removing acrylics won’t damage your natural nails as long as you soak them properly instead of peeling or scraping.
How often should I let my nails rest between acrylic sets?
Most experts recommend resting your nails for one to two weeks between acrylic applications.
Is it normal for nails to look thin after acrylic removal?
Yes, nails often look thin and feel weak temporarily right after acrylic removal, but they recover with proper care.