
Removing acrylic nails at home can feel risky, especially if you worry about damaging your natural nails. However, if you follow the right steps, you can safely handle the process yourself. In this complete guide, you will learn how to soak off acrylic nails at home with acetone using simple tools and a proven method. Moreover, this guide focuses on nail health, so you can remove acrylics without pain, breakage, or long-term damage.
Why You Should Remove Acrylic Nails Properly
Many people try to peel or force off acrylic nails. However, this habit causes serious damage. When you pull acrylics off, you also remove layers of your natural nail.
Therefore, you should always choose a safe acrylic nail removal method like acetone soaking. This method breaks down the acrylic gently and protects your nail plate.
Additionally, proper removal helps you:
- Prevent nail thinning
- Avoid pain and sensitivity
- Keep your nails smooth and healthy
What You Need Before You Start
Before you begin, gather all the tools. Preparation makes the process faster and safer.
Essential Tools & Products
- 100% pure acetone
- Cotton balls or pads
- Aluminum foil
- Nail file (180 grit)
- Cuticle pusher
- Nail buffer
- Cuticle oil
- Hand cream
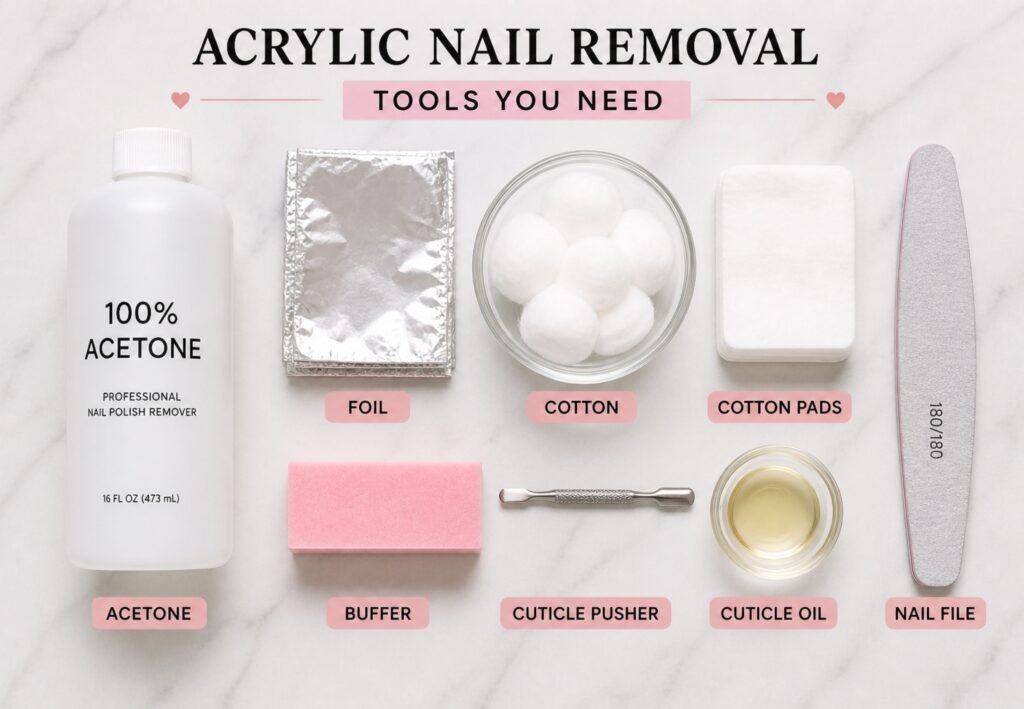
Moreover, choose high-quality acetone for the best results. A strong formula speeds up the acetone removal method and reduces soaking time.
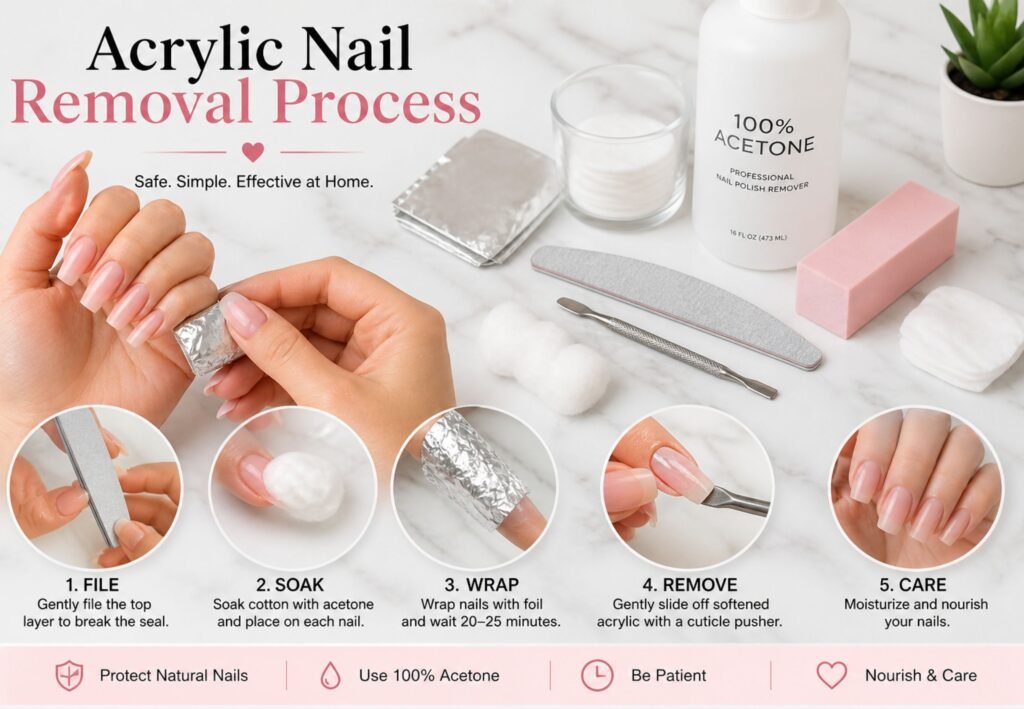
Step-by-Step Guide: How to Soak Off Acrylic Nails at Home with Acetone
Now, follow these steps carefully. Each step plays a key role in safe removal.
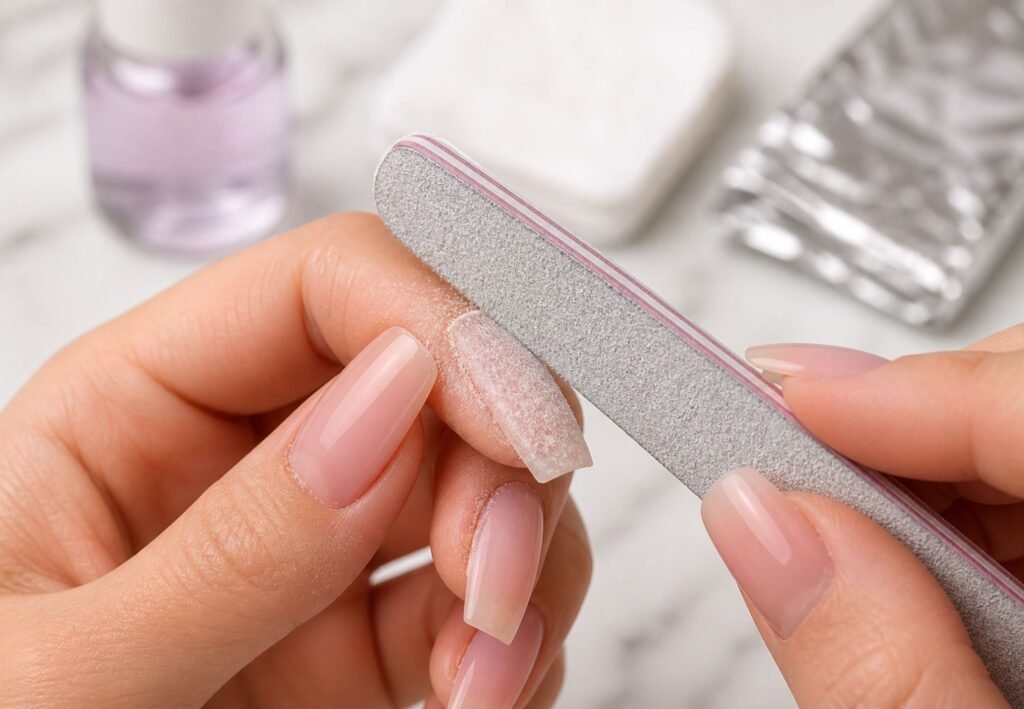
Step 1: Trim and File the Acrylic Nails
First, trim your acrylic nails as short as possible. This step reduces thickness and speeds up soaking.
Next, use a nail file to remove the shiny topcoat. This layer blocks acetone, so you must break it.
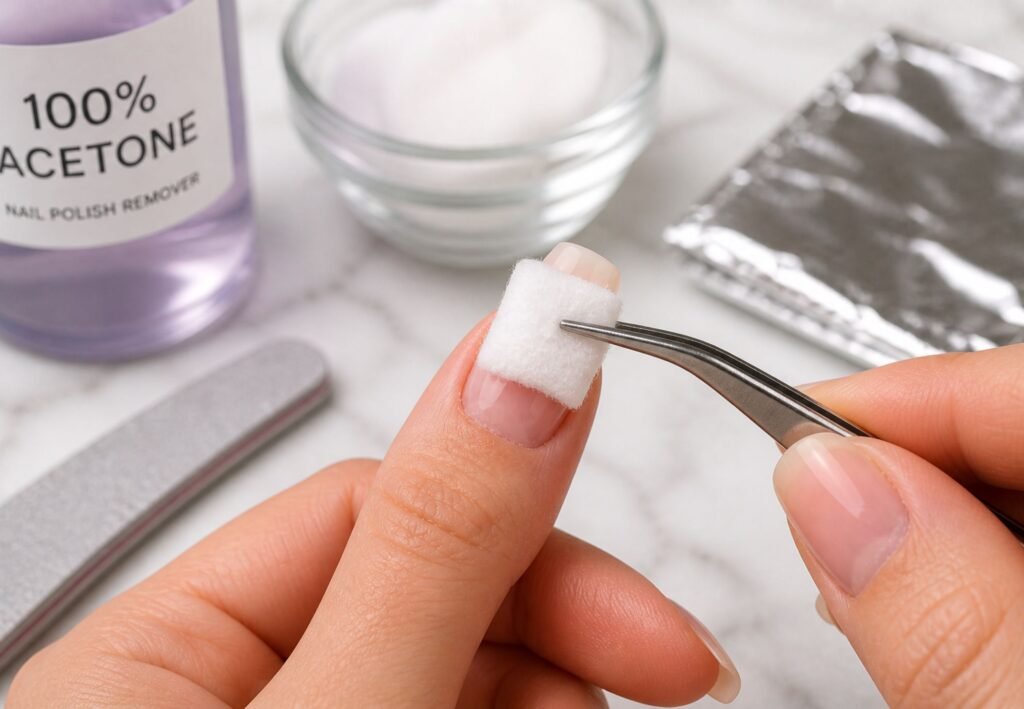
Step 2: Soak Cotton in Acetone
Now, soak cotton balls in 100% acetone. Make sure they are fully saturated.
After that, place one cotton piece on each nail.
Step 3: Wrap Nails with Foil
Wrap each finger with aluminum foil to hold the cotton in place. This step traps heat and helps acetone work faster.
Additionally, press the foil firmly so it stays secure.
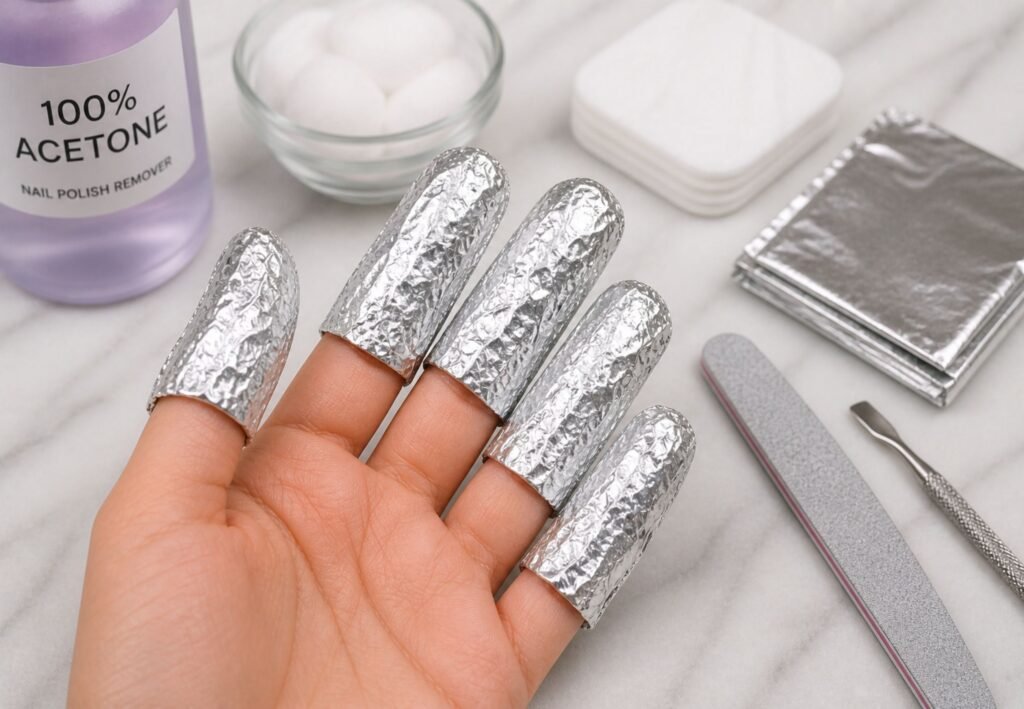
Step 4: Wait 20–25 Minutes
Let your nails soak for at least 20–25 minutes. During this time, acetone breaks down the acrylic.
However, avoid checking too early. Give the acetone enough time to soften the product completely.
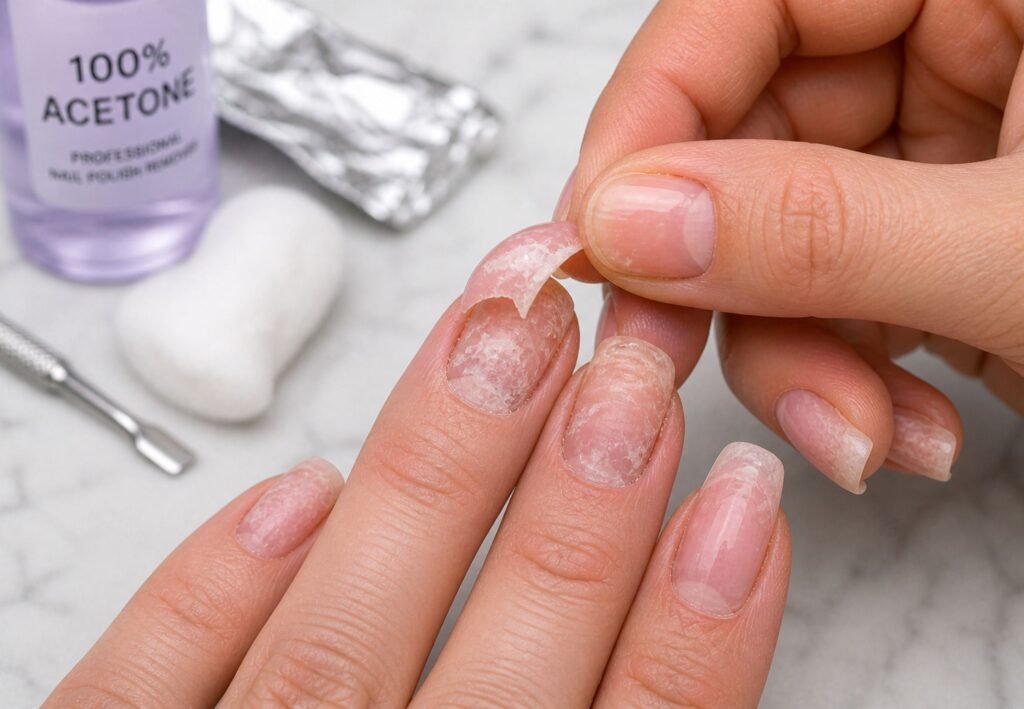
Step 5: Gently Remove Acrylic
Remove the foil and cotton. Then, use a cuticle pusher to slide off the softened acrylic.
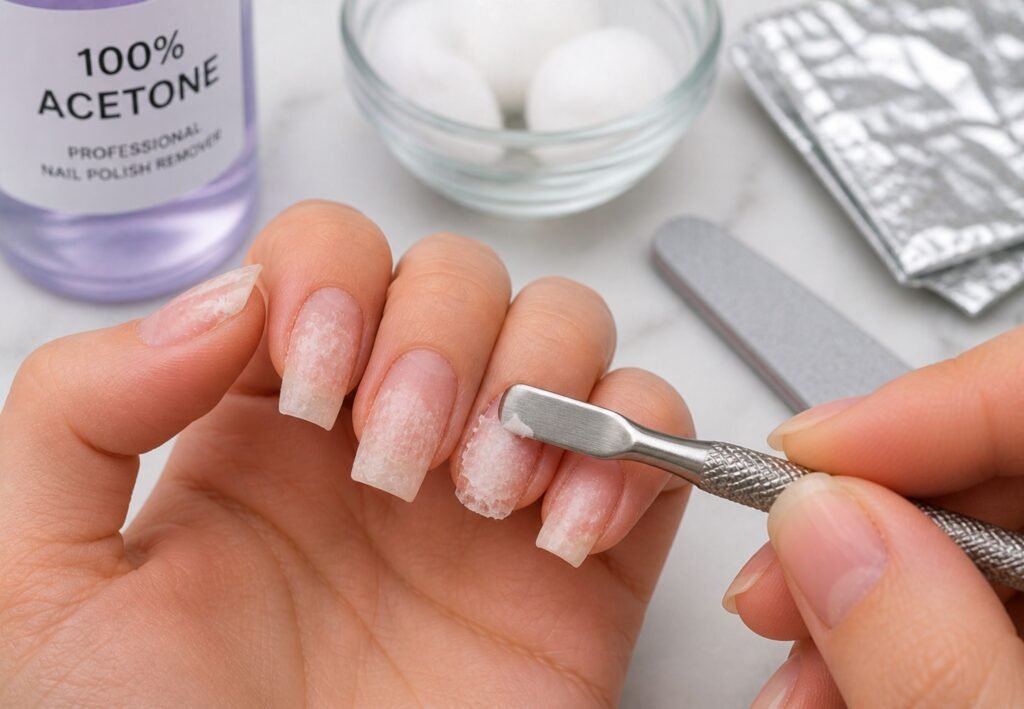
Step 6: Buff and Smooth Nails
After removing acrylics, buff your nails gently. This step smooths the surface and removes residue.
Moreover, avoid over-buffing because it weakens your nails.
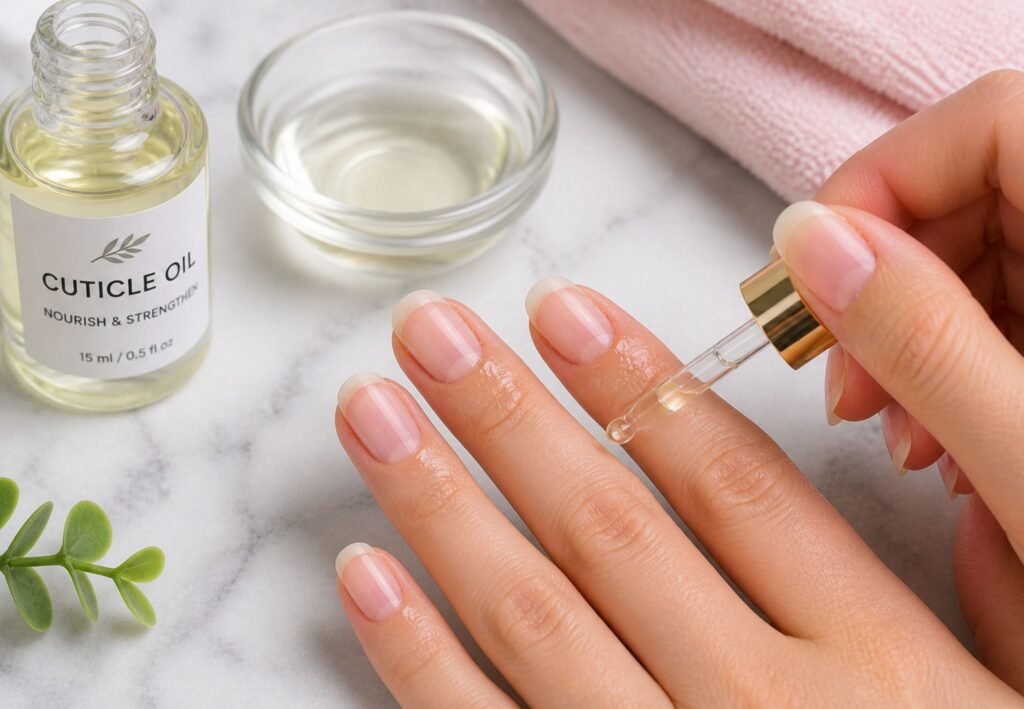
Step 7: Hydrate and Nourish
Finally, apply cuticle oil and hand cream. Acetone dries your nails, so hydration is essential.
Therefore, massage oil into your cuticles daily for best results.
Common Mistakes to Avoid
Even though the process looks simple, many people make mistakes. These errors damage nails quickly.
Avoid These Mistakes:
- Peeling off acrylic nails
- Skipping the filing step
- Using low-quality acetone
- Rushing the soaking time
- Scraping too hard
Moreover, patience is key. A slow and careful approach always gives better results.
Tips to Protect Natural Nails During Removal
If you want healthy nails, you must protect them during the process.
Smart Protection Tips:
- Use petroleum jelly around cuticles before soaking
- Do not file aggressively
- Take breaks between sets
- Keep nails hydrated
Additionally, follow a DIY acrylic nail removal routine regularly to avoid damage.
Aftercare Routine for Strong Nails
After removal, your nails need care and recovery.
Best Aftercare Steps:
- Apply cuticle oil twice daily
- Use a nail strengthener
- Keep nails short for a few days
- Avoid harsh chemicals
Furthermore, drink plenty of water and maintain a healthy diet. Strong nails start from within.
Signs of Nail Damage
Sometimes, nails need a break. Therefore, watch for these warning signs:
- Peeling or splitting nails
- Thin or soft nail plate
- Discoloration
- Pain or sensitivity
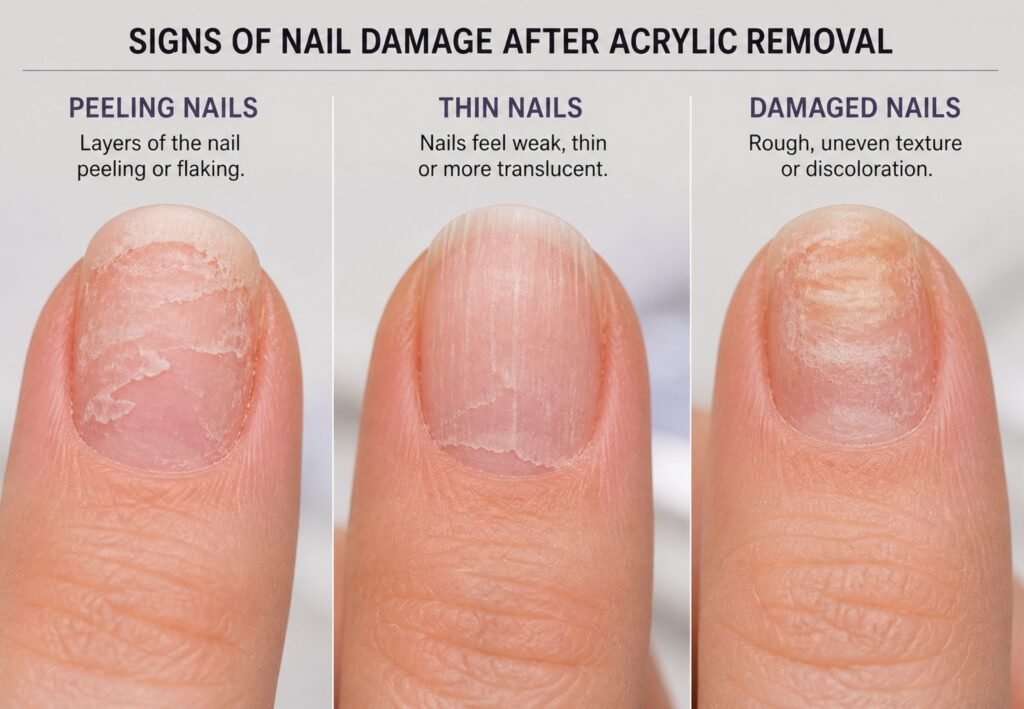
If you notice these signs, stop using acrylics for a few weeks.
Alternative Methods
Although acetone works best, you can try other options.
Other Removal Methods:
- Warm water + soap (slow and less effective)
- Dental floss method (not recommended)
- Professional salon removal (safest option)
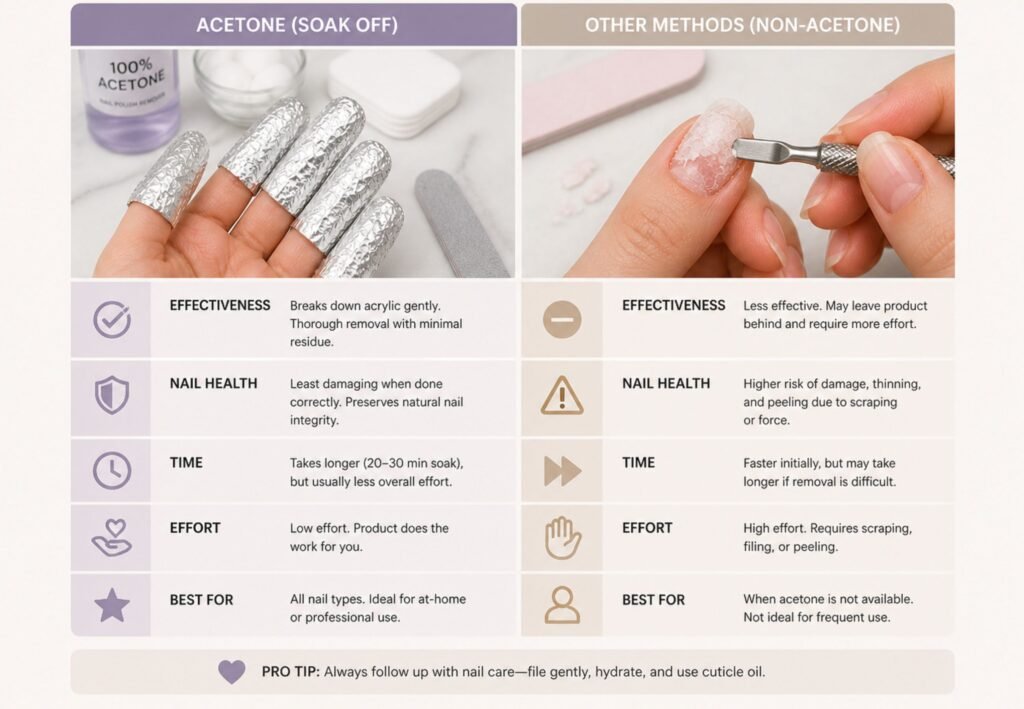
However, the acetone removal method remains the fastest and most reliable.
Conclusion
Now you fully understand how to soak off acrylic nails at home with acetone safely and effectively. Start with proper tools, follow each step carefully, and never rush the process. Moreover, protect your natural nails with gentle handling and consistent aftercare. When you combine the right technique with patience, you can remove acrylic nails at home without damage and keep your nails strong, smooth, and healthy.
FAQs
Q1: How to soak off acrylic nails at home with acetone quickly?
Soak with foil wraps for 20–25 minutes and avoid rushing the process.
Q2: Can I remove acrylic nails at home without acetone?
Yes, but non-acetone methods take longer and work less effectively.
Q3: Does acetone damage natural nails?
Acetone dries nails, but proper aftercare prevents damage.
Q4: How often can I use the acetone removal method?
Use it only when needed and allow breaks between acrylic sets.
Q5: What is the safest DIY acrylic nail removal method?
The safest method is soaking with acetone and removing gently without force.